Footwork – a guide to balance & precision
Note: Before going ahead with a training regime we strongly recommend you seek professional advice from a qualified climbing coach. Always warm up thoroughly before attempting any of the drills included in this article
Often our first steps in climbing are the most important: understanding how our feet connect with the holds and how our arms hang from the holds are key skills that can come naturally for some and can be a constant battle for others. This article looks at basic movement techniques, which will lay the framework to help you push forward towards your goals in the world of climbing.
Footwork
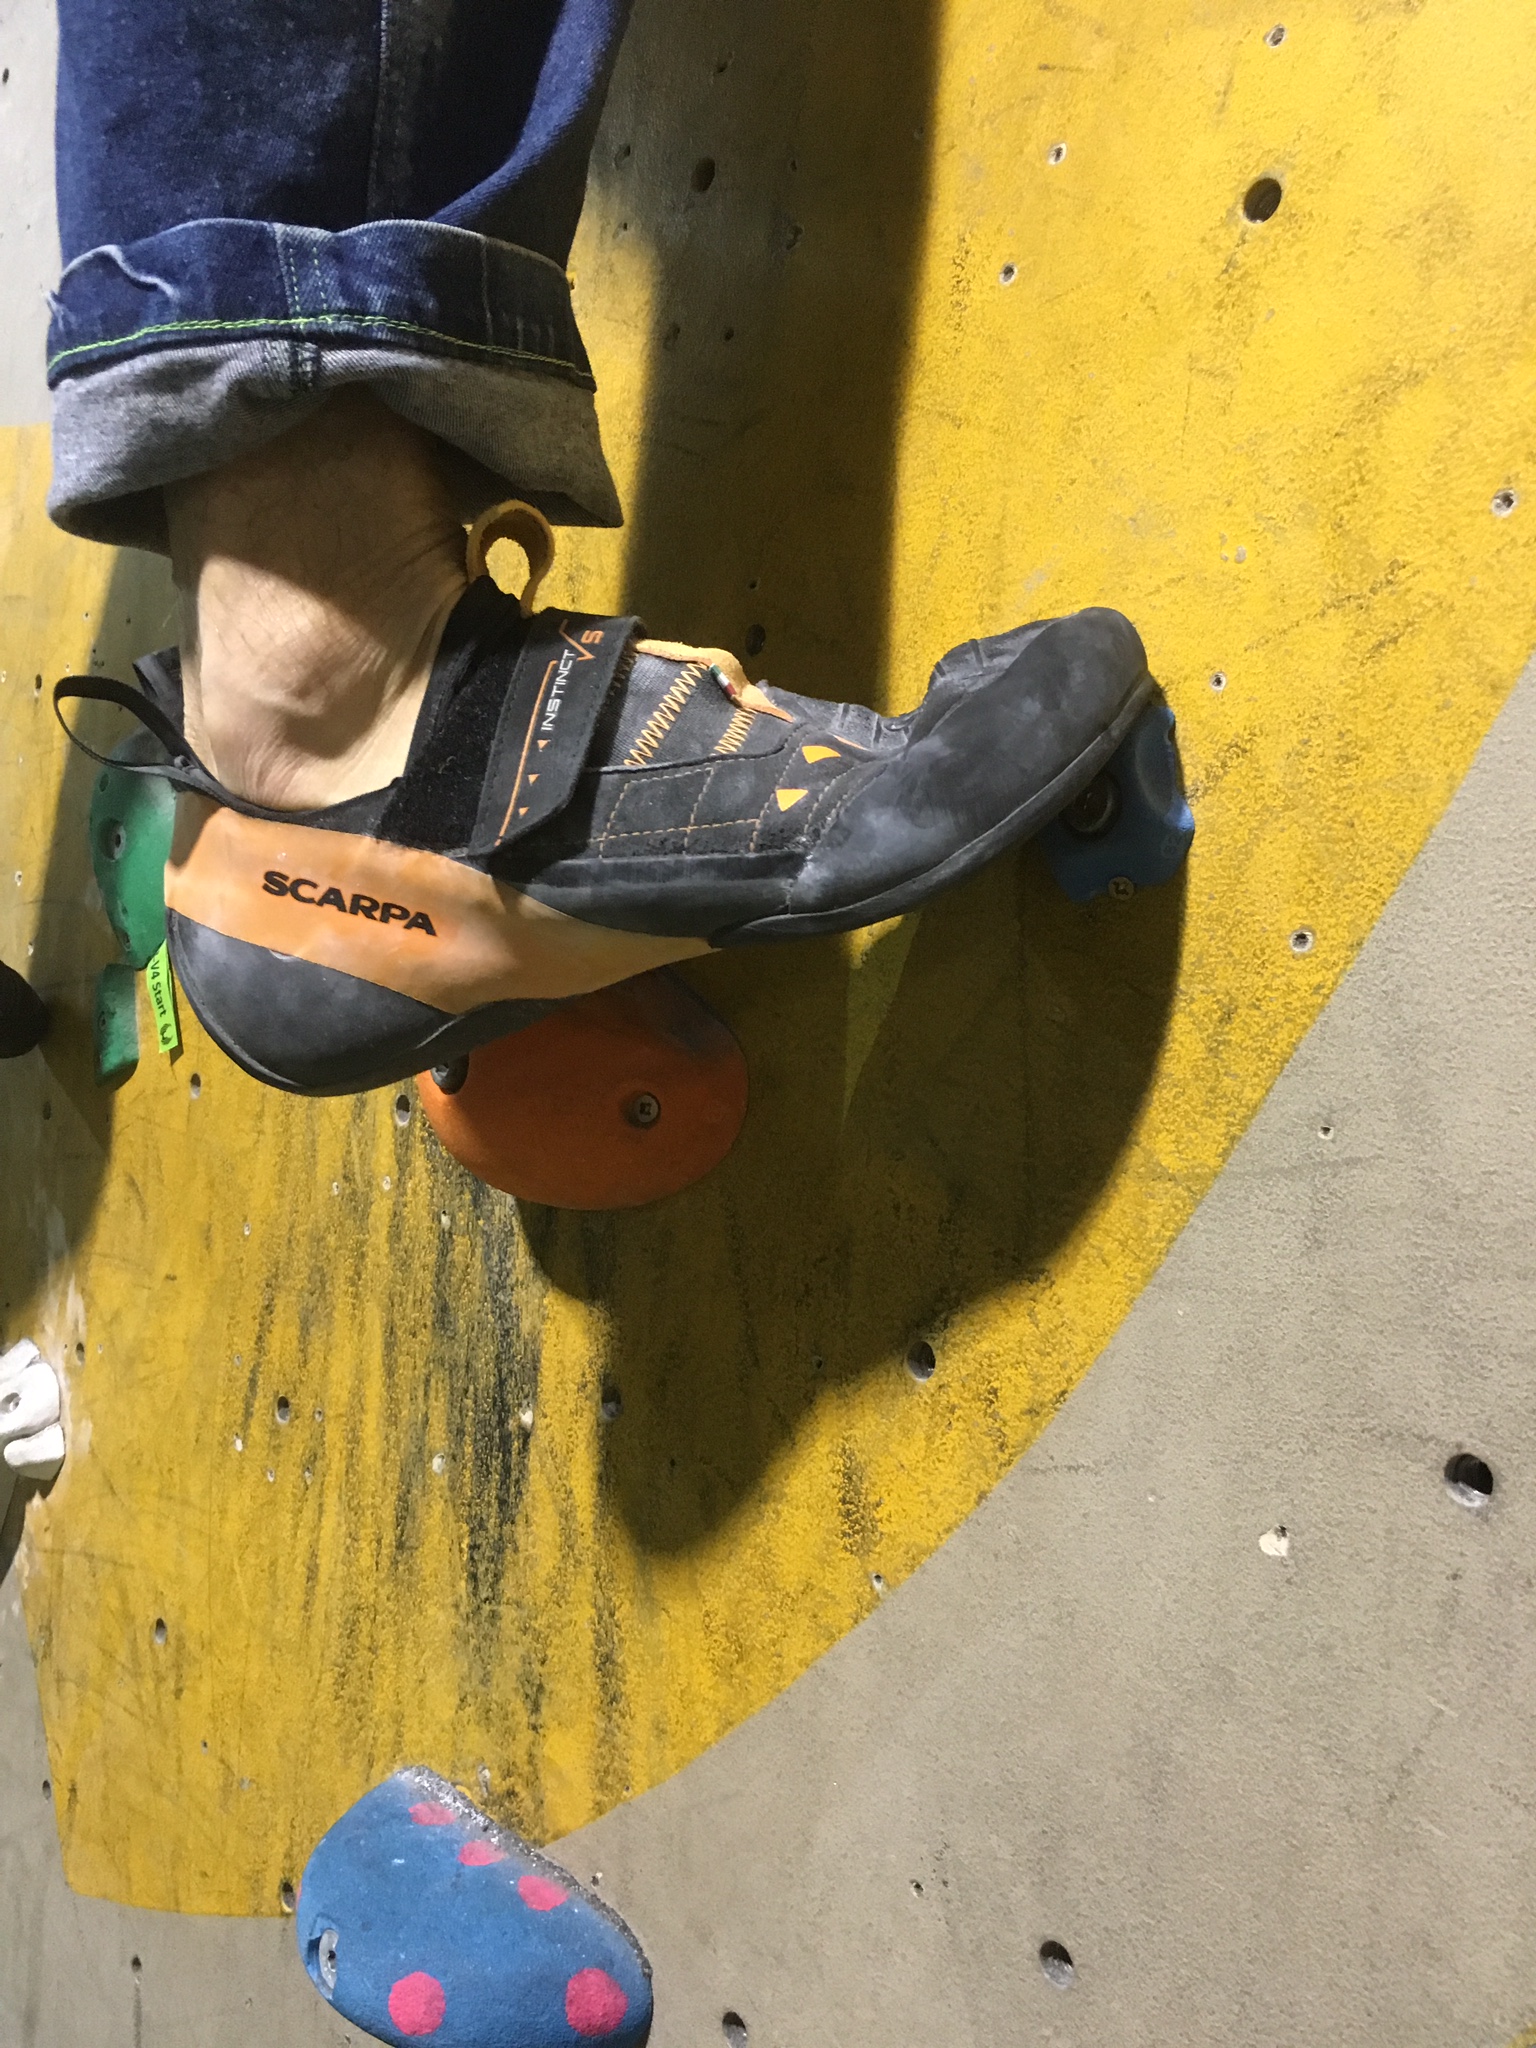
Every time we climb our goal should be to use perfect footwork, placing the toe into the foothold smoothly without noise and scuffing down the wall and without having to reposition or over test the foothold. By doing this you will help keep the weight on your feet so reducing the stress on your arms and hands and allow yourself to move freely and smoothly. Figure 1 shows a well place foot with the toes nestled nicely into the foothold, whilst Figure 2 shows a badly places foot with the ball of the foot pressed into the hold, this prevent a full range of motion from the foot, is likely to slip from the foothold and will prevent the foot from pivoting and changing direction as the body moves.
Figure 1: Well placed foot with toes nestled into hold allowing for future pivoting
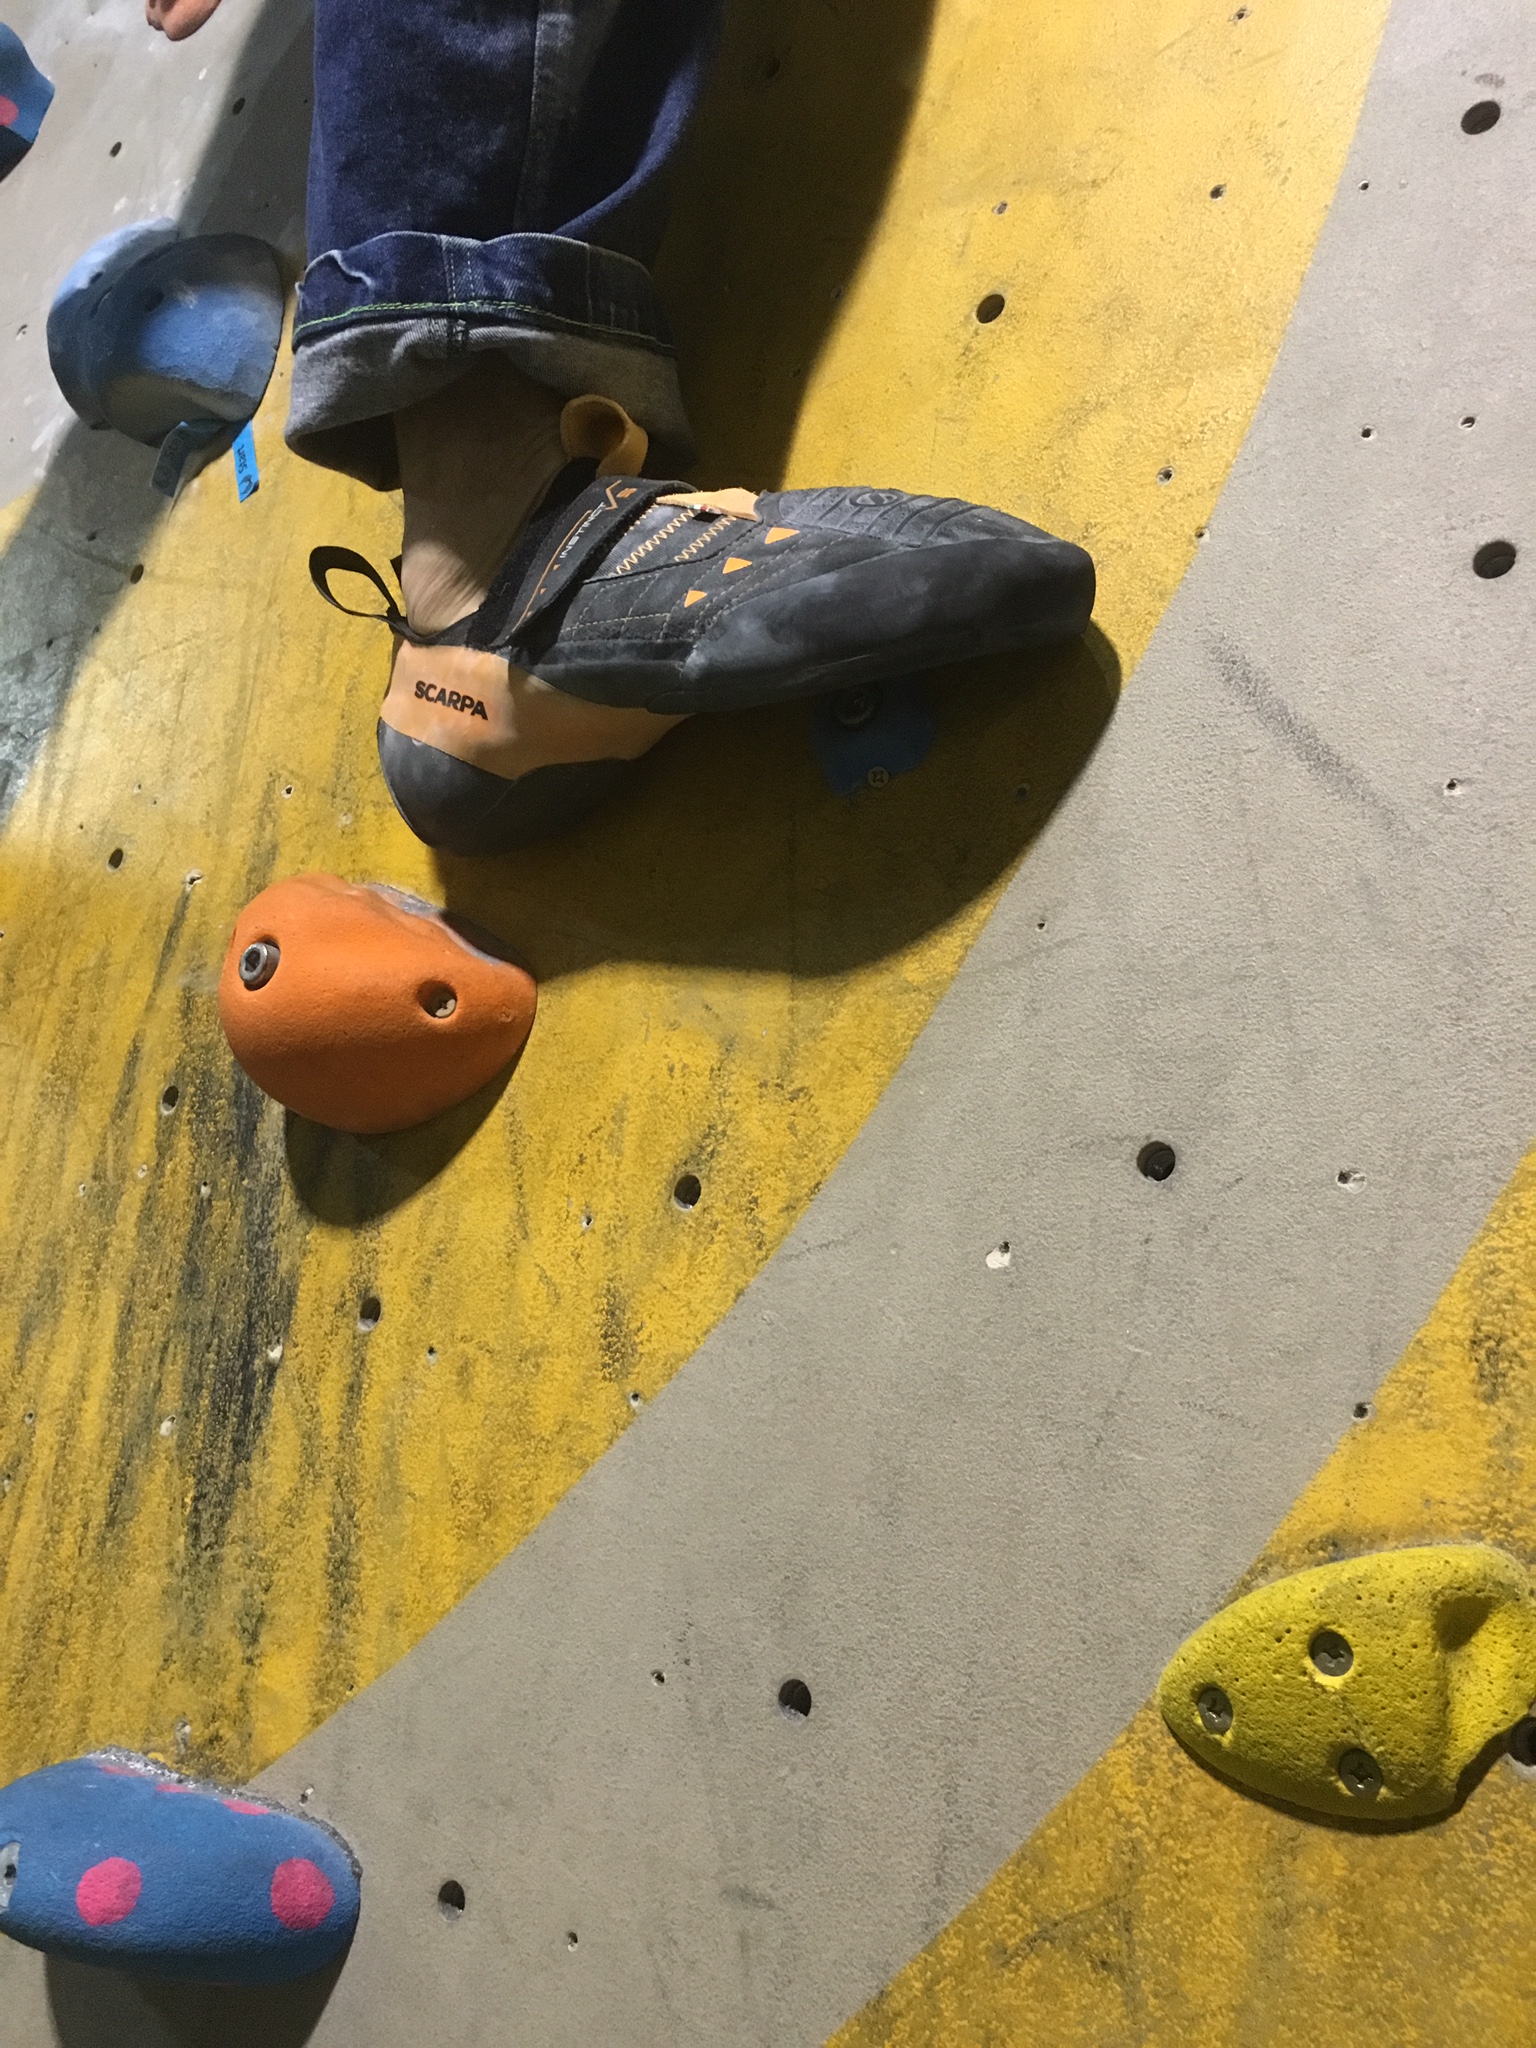
Figure 2: Badly placed foot, toes isn’t on hold and position will prevent pivoting
Footwork Drills
Note: The drills below are slightly simplified for the purpose of this article. For a full analysis of your technique please consult a professional climbing coach.
Once warmed up with a few minutes cardiovascular exercise it’s a good time to practice with some movement drills. The easiest way of doing this is to find a vertical or slightly overhanging wall with an abundance of holds (preferably positive holds) and traverse along it.
Drill 1: On your first traverse you should focus entirely on your feet, placing your toes precisely and quietly with no scuffing down the walls and no re-adjustment. This may take a few traverses to perfect; to progress try and use smaller footholds that require more precise placements.
Drill 2: Once you have practiced the footwork drills progress to climbing with straight positioning your body below the active handhold as much as possible. To achieve this you will need to bend you knees and sink your bum toward the ground.
Drill 3: Combine drill 1 and 2 together to try and produce a smooth and fluid climbing style. It may be worthwhile getting a friend to video yourself so you can see how you are climbing.
Drill 4: Increase the speed of the traverse. This will start to stress prove the technique and help engrain it in your motor memory.
Drill 5: All of the above but try and combine with relaxed deep breaths, this is a key step in preparing for climbing routes smoothly, minimizing fatigue and helping you to control anxiety.
Footwork – Balance For Slabs
Body position is key for efficient and stable climbing on slabs. We should be standing with the hips vertically over our feet, bending at the waist so we can see our feet and choice appropriate footholds. To move we aim to shift our centre of gravity (hips) over the foot and stand up as shown in the demonstration video below here the climber shifts his centre of gravity of the active foot before moving to the next hold. A good rhyme to remember this is ‘nose over toes’.
Footwork – Foot Swap
The foot swap is a key part of every climber’s development, allowing you to easily shift your centre of gravity to where it’s needed and get your feet positioned perfectly for the next move.
Saving Space: The easiest way to swap feet is to leave enough space on the foothold to place the other foot beside it. This is demonstrated in Figure 3, if there is not enough space on the foothold then you need to adjust to a roll on / roll off technique.

Figure 3.1: Enough room is left on the foothold for the other foot to be placed beside it

Figure 3.2: Enough room is left on the foothold for the other foot to be placed beside it
Roll on / roll off: This technique is worth practicing as it can require good balance and precision as the footholds and hand holds get worse. The aim is to hover the inactive foot above and to the side of the active foot and gentle roll the active foot off the foothold and the inactive foot onto the foothold.
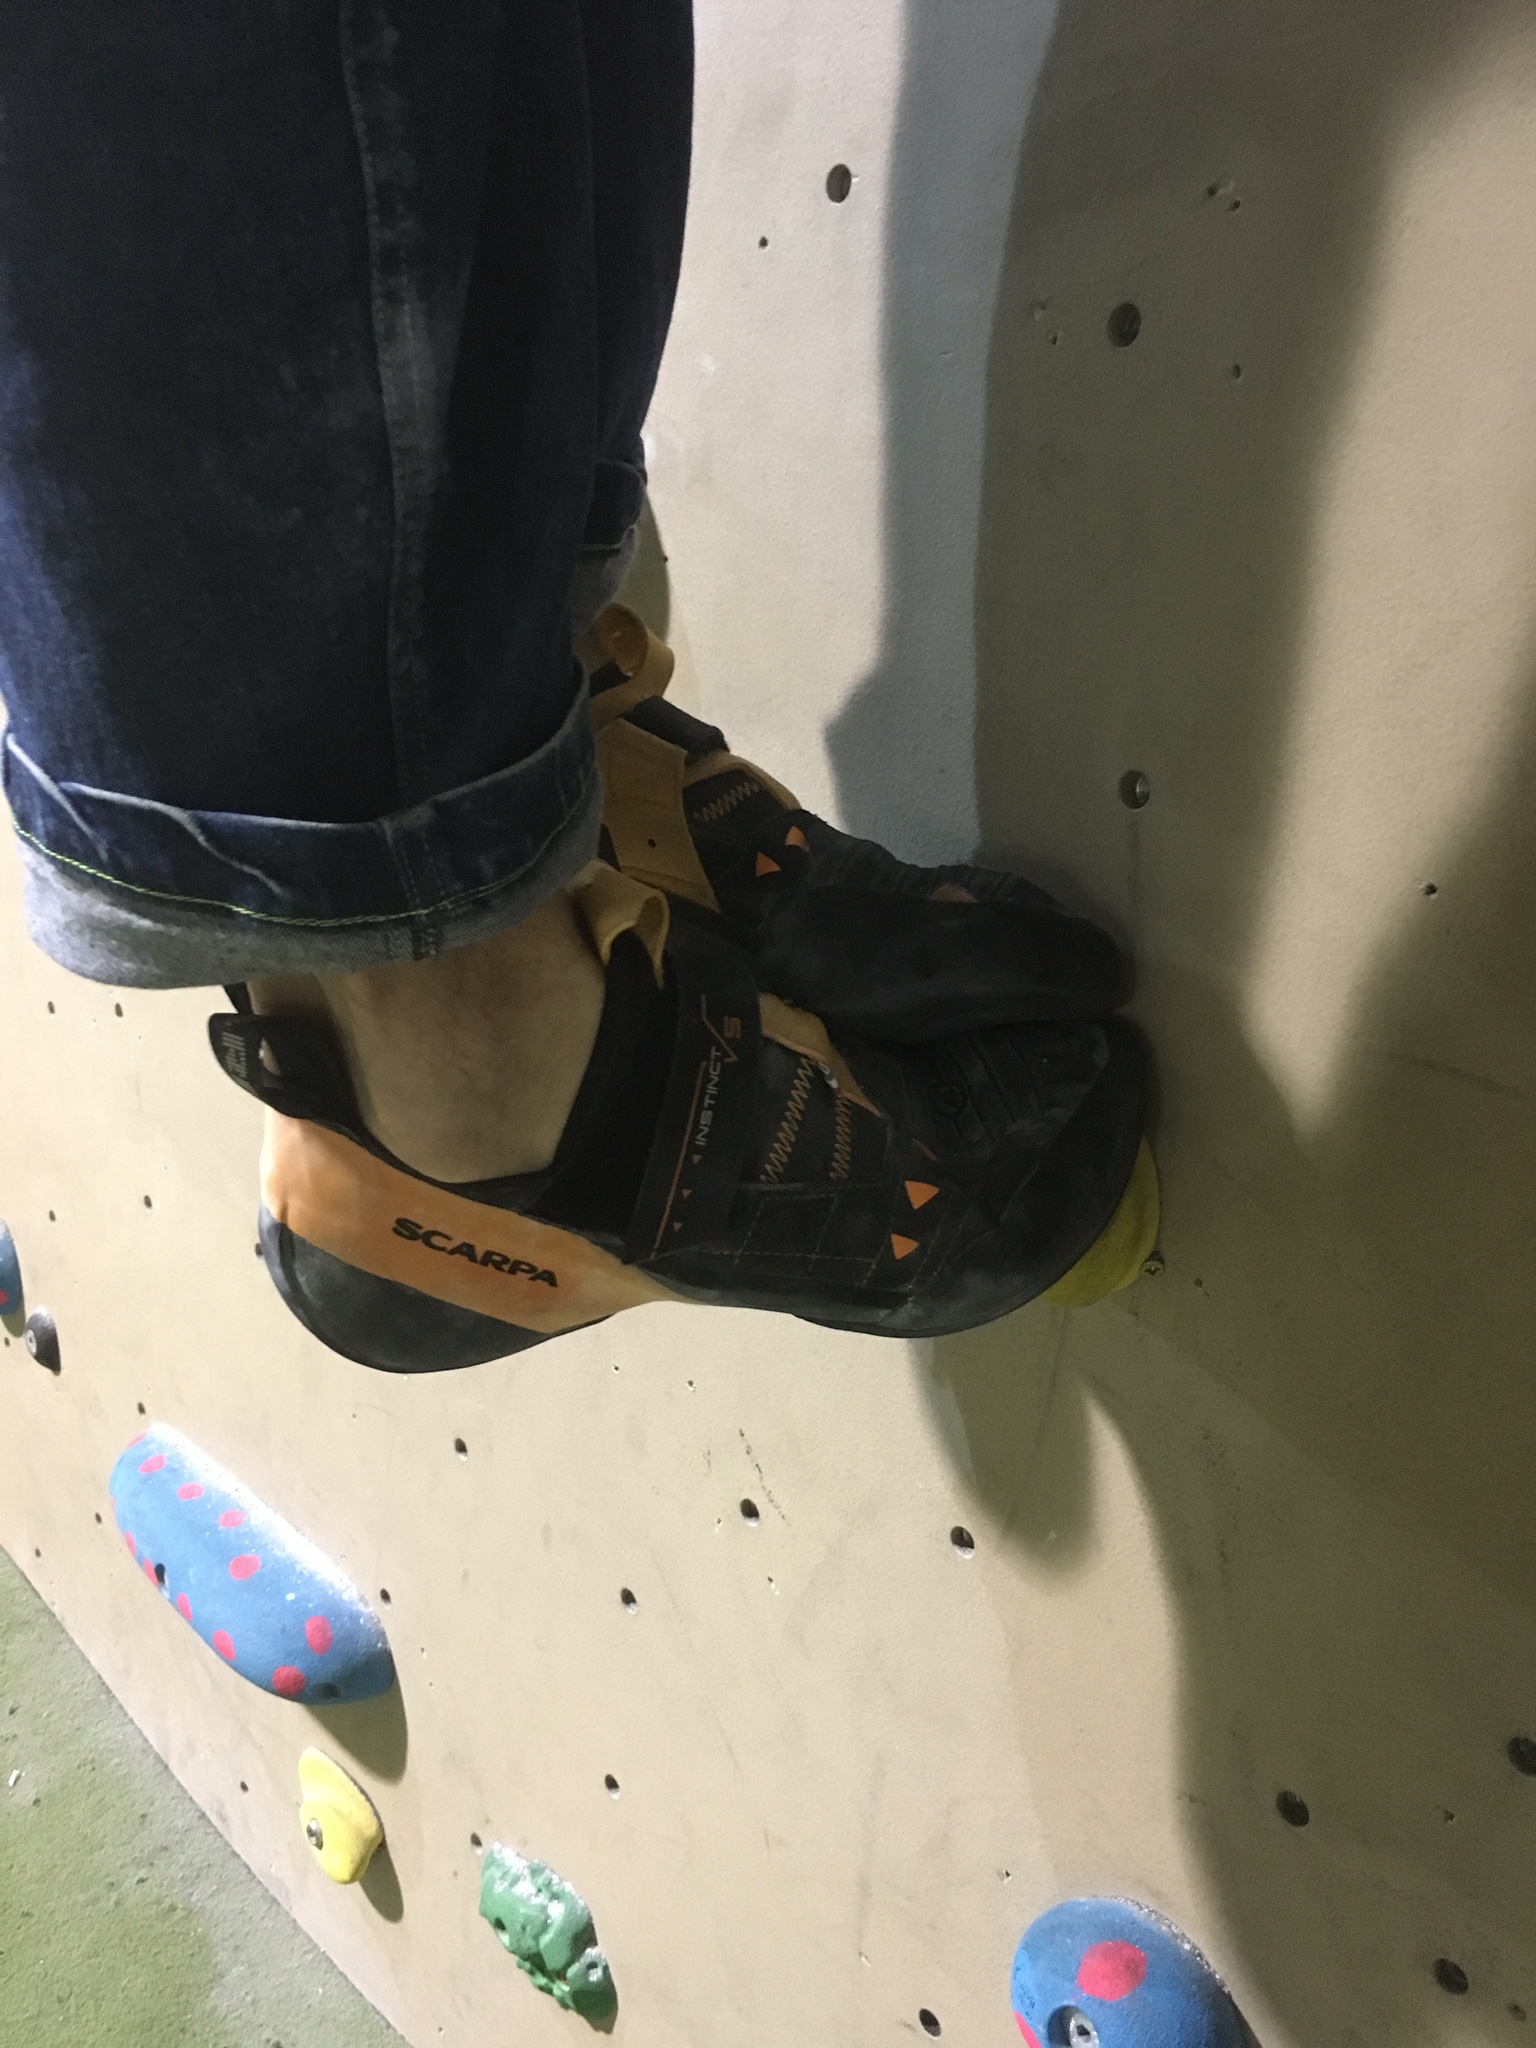
Figure 4.1: Roll on / Roll off foot swap. The foot is first hovered over the foothold as the active foot is rolled off and the other foot rolled on to the foothold.
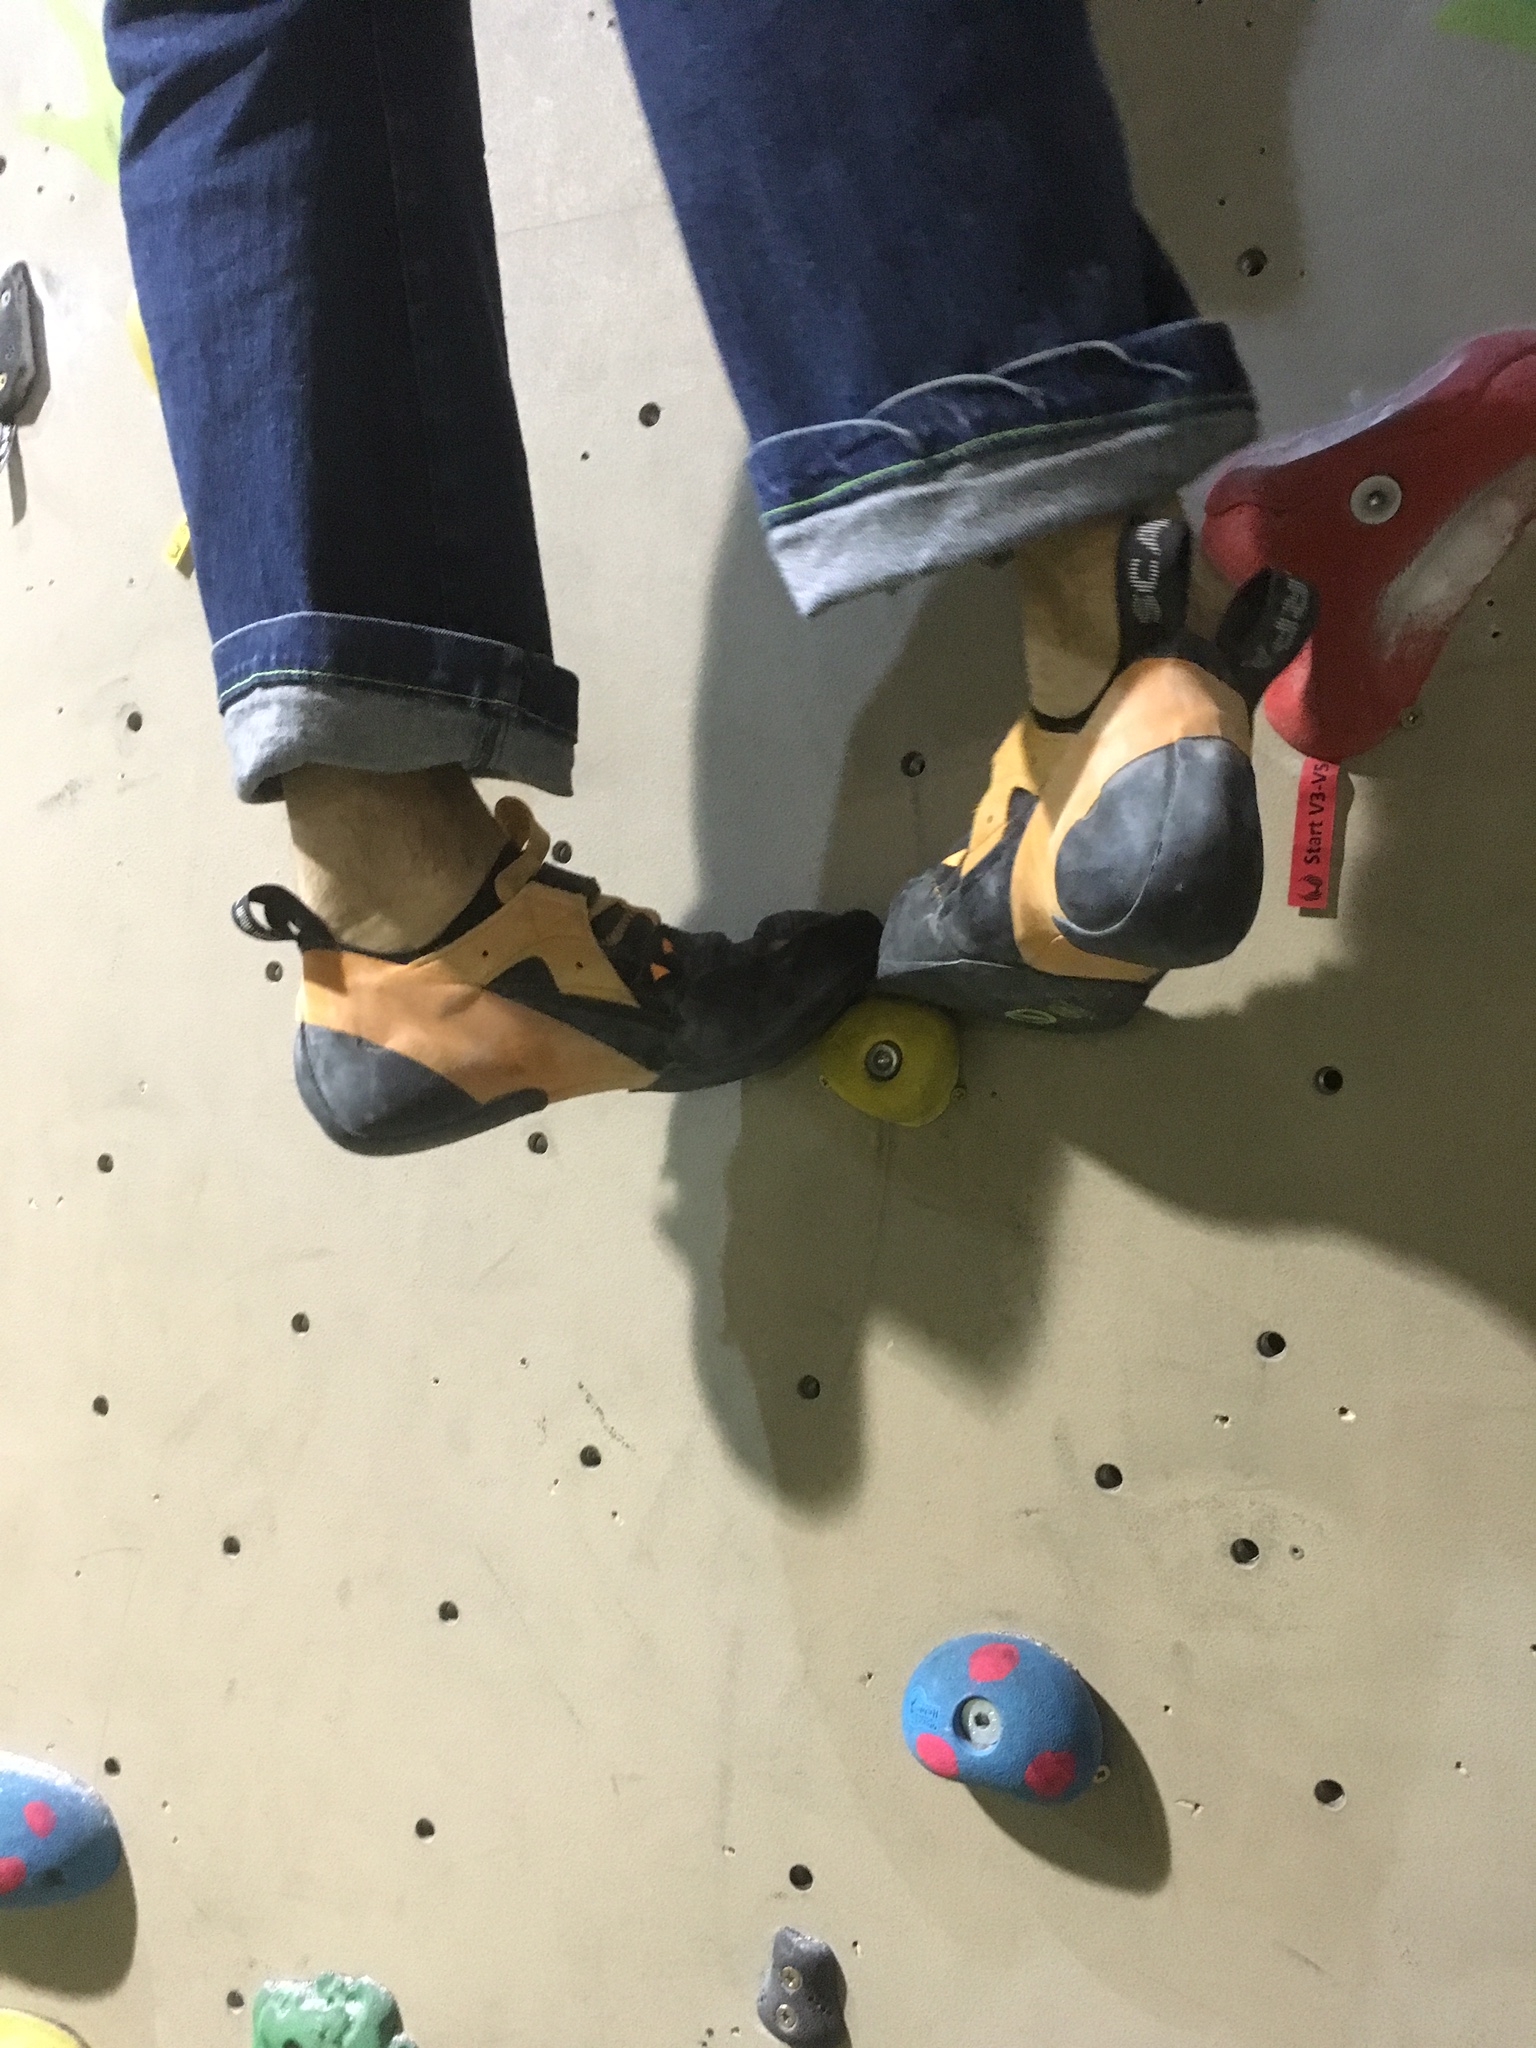
Figure 4.2: Roll on / Roll off foot swap. The foot is first hovered over the foothold as the active foot is rolled off and the other foot rolled on to the foothold.
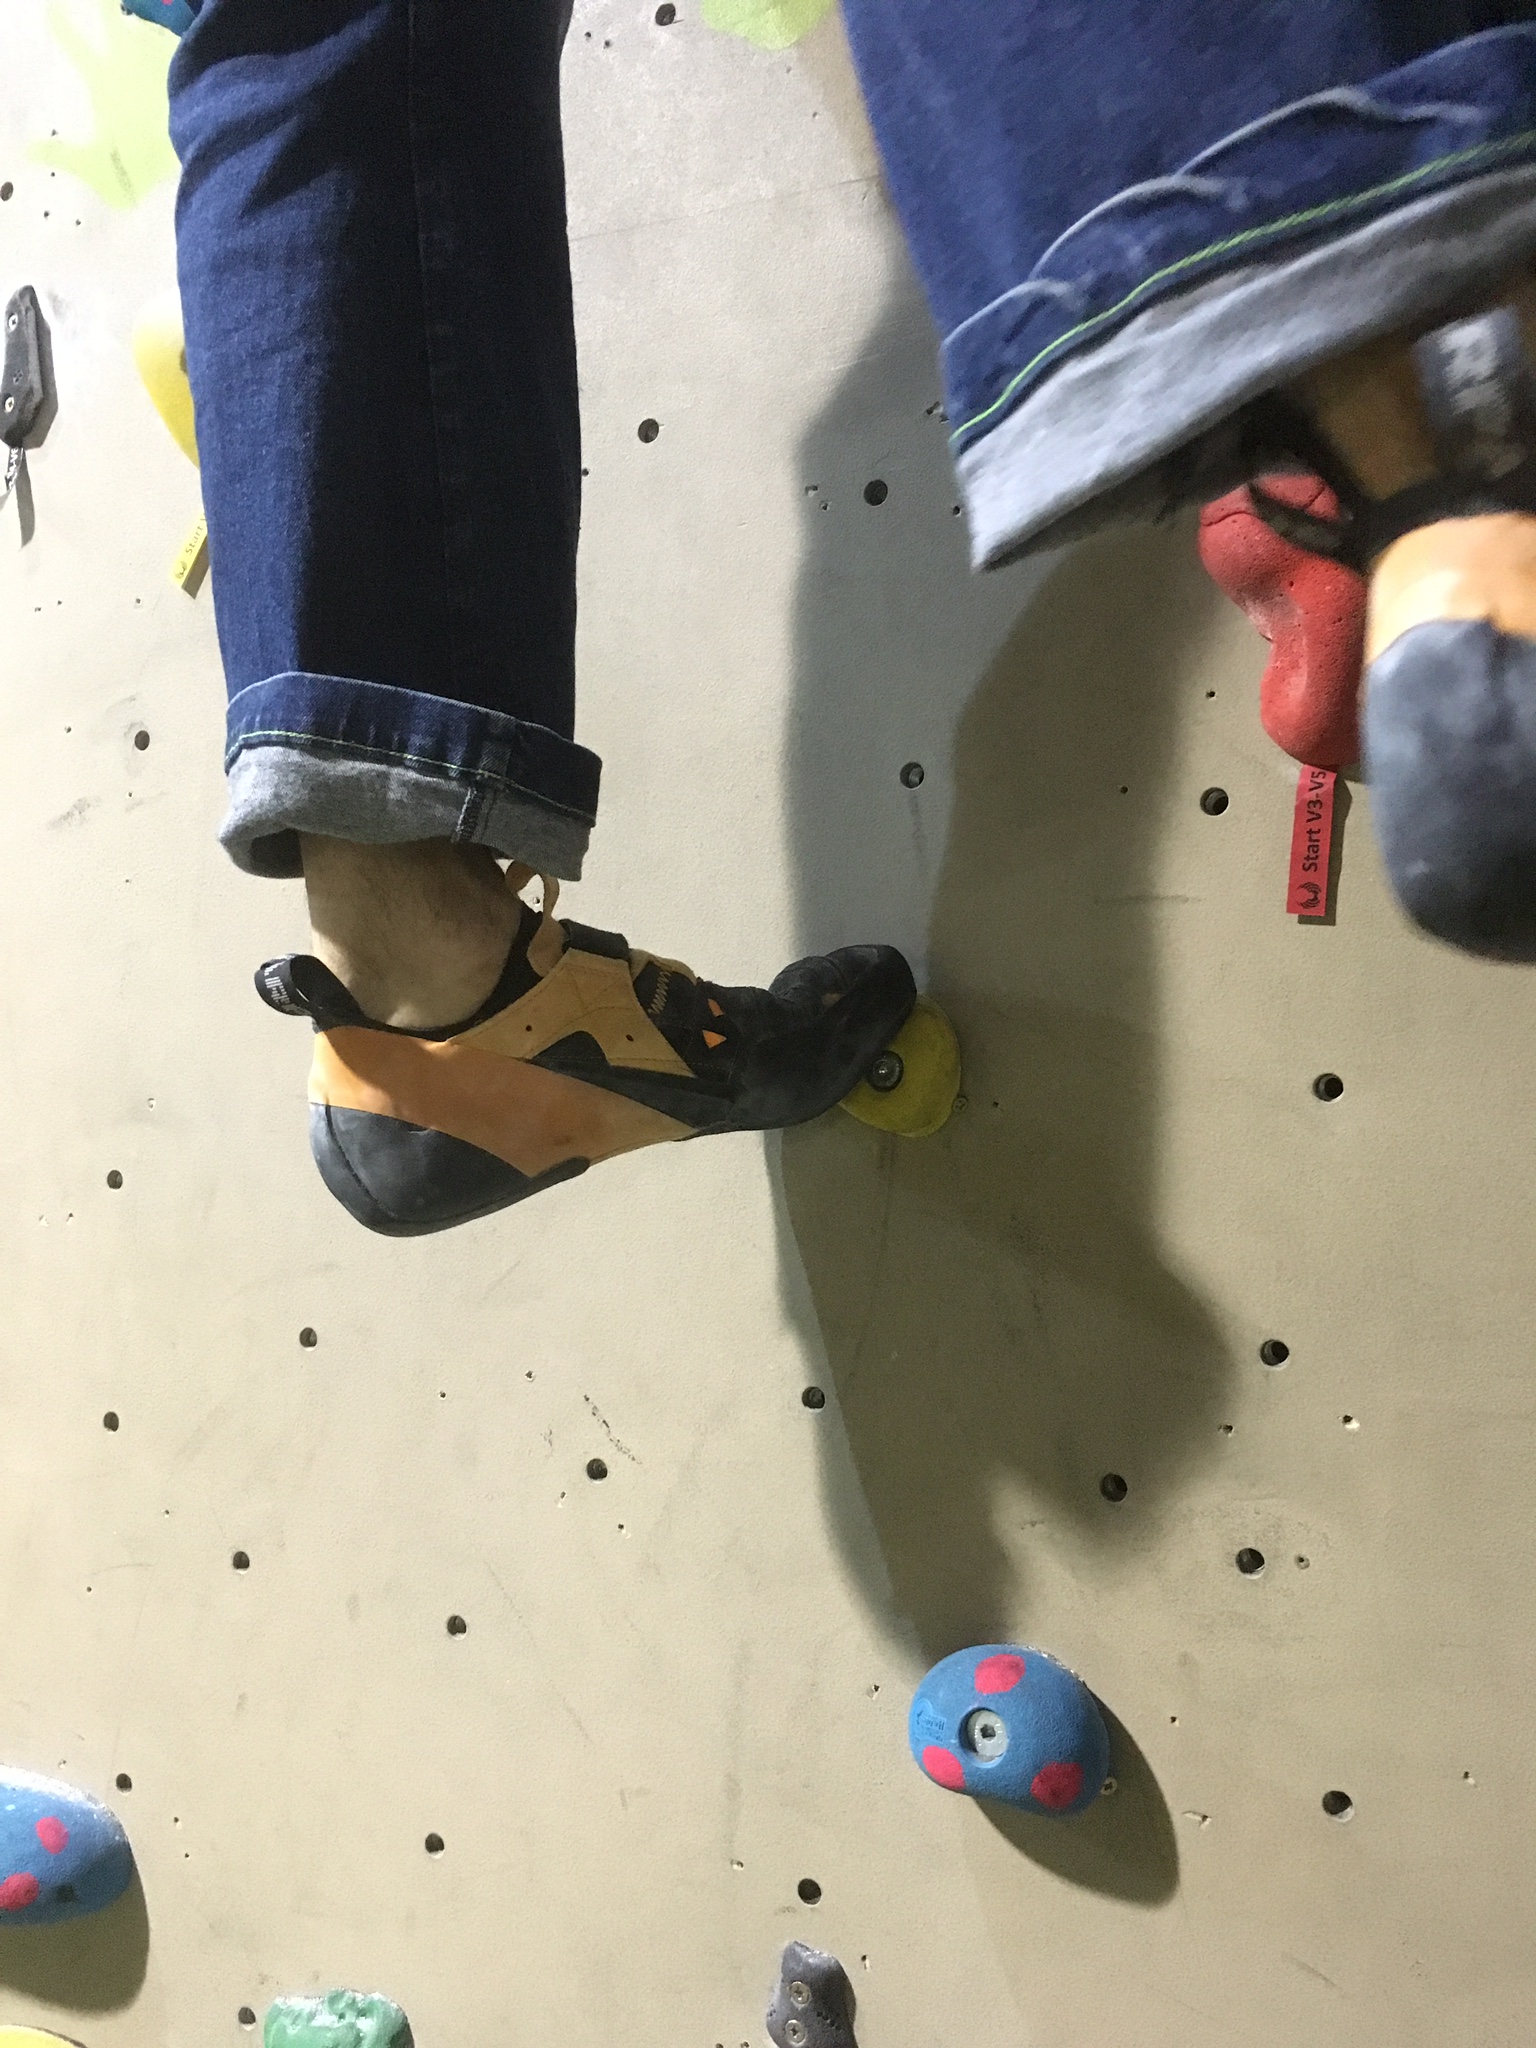
Figure 4.3: Roll on / Roll off foot swap. The foot is first hovered over the foothold as the active foot is rolled off and the other foot rolled on to the foothold.
Below is a video demonstration of the roll on / roll off foot swap technique.
For more details of how we can help you us visit our Training and Coaching page or for a review of your footwork book a session now with our head coach Jon Redshaw or contact us direct.